I remember the last class before the brake some of you were interested in modelling a symmetrical face.
Here's a excellent tutorial for using it properly.
http://foreverblender.blogspot.com/2010/08/mirror-modifier.html
Merry Christmas, Blender friends :)
Saturday, December 25, 2010
Monday, December 20, 2010
Rigging your Character
If some of you are really interested in animating whatever you have modelled so far, here are some great tutorials explaining how to set up a simple rigging system. I have followed along the sphere rigging tutorial and did what they said to do. I will see if I can post that blend. file soon.
To rig a simple sphere, watch:
http://www.blendercookie.com/2010/09/29/creating-a-bouncing-ball-rig/
To rig a more complex character, watch:
http://www.youtube.com/watch?v=ZU8Qcm5_Oc0&feature=related
Good luck and Merry Christmas!!!
To rig a simple sphere, watch:
http://www.blendercookie.com/2010/09/29/creating-a-bouncing-ball-rig/
To rig a more complex character, watch:
http://www.youtube.com/watch?v=ZU8Qcm5_Oc0&feature=related
Good luck and Merry Christmas!!!
Tuesday, December 7, 2010
Adding Sound to your Claymation
Here is another GIF tutorial check out the Stickman GIF.

Claymation Sizing Problems?
If your animation is too large, first save it to the desktop on your computer and then resize it either by using the crop tool, or the Image> Image Size reduce the pixel dimention by at least 1/2 of the size to under 1000 pixels x 1000 pixels.
Here is a web site with a few sollutions:
Web reference
Here is a web site with a few sollutions:
Web reference
Thursday, November 25, 2010
Stop-Motion Claymation/Animation
- First you are to create/develop a character. Your character should have distinct qualities that give it personality. Your character will inspire the story in your animation, so consider the features well. It can be very simple and abstract.
- Develop your story ideas. Brainstorm a very short narrative where something happens to your character and resolves- very quickly.
- Create a storyboard. Your storyboard is very important to follow. Your animation will be shot in order of your frames in your storyboard- make it right.
- Create your animation in 30 to 60 frames. If you want to work with some one, your animation should have two characters and double the frames. (You can make a longer animation if you want/need)
- Photograph your sequence with changes in the poses and positioning of your character, one frame at a time.
- Download your photos into your network file.
- Assemble your frames on the computer using Adobe Photoshop you can alter your image here if you want. If you have a longer piece, you may want to use a different program- TBA.
Wednesday, November 24, 2010
Monday, November 22, 2010
Wednesday, November 17, 2010
Adding Text and Titles to your Animation
You need a title and credit(s) for your animation to finish it off.
Start a new scene so that you don't have to move your whole animation along to fit your title in the beginning and rename it scene 1, your main animation scene 2, and the final credits in scene 3.
Here is a Tutorial for a text effect in Flash- Glint Text Effect
Start a new scene so that you don't have to move your whole animation along to fit your title in the beginning and rename it scene 1, your main animation scene 2, and the final credits in scene 3.
Here is a Tutorial for a text effect in Flash- Glint Text Effect
Tuesday, November 16, 2010
Animation Feedback/Reflections
- Create a new Word Document, save it with "Your Name_ Animation Comments"
- Do not write anything in the document.
- Close the Word Document
- View an animation in the "Flash Background Project" folder.
- Give constructive feedback in the Word document titled with their Name.
- Save & close.
- View another and repeat step 4-6 until you have viewed them all.
Monday, November 15, 2010
Animation Reflection
Background First Animation
Your Mark | Out of | Comments | |
Background(s) establishes animation sets the stage for events happening in the piece. | 10 | ||
Characters are well developed | 10 | ||
Strong narrative, includes introduction, conflict and resolution: | 10 | ||
There are 3 perspectives/ viewpoints | 10 | ||
There is a cut-away included | 5 | ||
Overall animation is thoughtful, creative and eye catching | 5 | ||
Total | 50 |
Reflect on your animation:
- Describe your background
- Describe your character(s)
- How does the character interact with the background?
- What is your animation about, what is the story?
- Is your animation interesting and eye catching?
- Did you have to adapt your story from the original ideas? Why or why not?
- What challenges did you have while producing this animation? What would you do next time? Or what would you want to work on to improve?
Monday, November 1, 2010
Bone Tool Frustrations
Hi guys,
I'm sorry I'm not there today. Some of you are getting frustrated with the "Bone Tool". Here is a blog that discusses some of the problems and offeres a solution or two:
http://blog.labwire.ca/?p=3
Try adding scenes if you are finding your animation is getting too long:
Scene to scene tutorial
Also you can group your layers if you are finding there are too many layers:
I haven't found a tutorial yet, sorry
Try using filters and the blur tool:
Using filters
Blur Drop Shadow
Blur Filter- not a very good tutorial, but explains it.
Filters- Better tutorial
Here is a good tutorial site:
Incredible Tutorials
Monday, October 25, 2010
Monday & More Flash- Oct. 25
** Note- Everyone should have handed in their storyboard for the Background inspired animation project. If you haven't, please bring it Tuesday.**
Today you are going to continue working on your Background first animation and develop your characters. I have found a few tutorials for you to look at to help you as you go:
Adobe TV
try -
06 Object and Merge Drawing Modes
07 Understanding Symbols
11 Understanding Tweens
13 Creating Motion Tweens
Creating Motion Tweens Part1
Creating Motion Tweens Part2
Monday, October 18, 2010
Background First Animation Project
We have been developing ideas through finding backgrounds that inspire stories. Now we are developing the story to go with your chosen background(s). By now you should have finished brainstorming your story and character(s). Today your storyboards are due. Make sure you include the following in your storyboard:
- Background(s)
- Character(s)
- Strong narrative: establish space and character(s), creates a conflict, and then resolves.
- Include at least 3 perspectives (variety in the frame, use different angles, change the distance to subject, POV or point of view)
- Use a Cut-Away- where you switch your frame to draw attention to something and/or lapse time more rapidy.
- Layers & grouping layers,
- Working with scenes motion guide,
- Importing an image & manipulating the image (Trace Bitmap),
- Bone tool.
- Again we will continue to use both frame by frame and tween animation,
- Hope the shape tween will work and create sounds to suite your animation.
- You are to create opening and closing credits
Wednesday, October 13, 2010
Backgrounds
We are going to begin to view some traditional and experiemtnal animations to see how backgrounds are used to establish the scene.
Notice the use of space, lighting, time lapse, and point of view.
Animation Background Blog
We are watching Duck Amuck, Papiroflexia, the Fly in the Share folder:
Notice the use of space, lighting, time lapse, and point of view.
Animation Background Blog
We are watching Duck Amuck, Papiroflexia, the Fly in the Share folder:
Tuesday, October 5, 2010
When the Day Breaks
Watch When the Day Breaks
Listen to this video. Notice how the sounds relate to the characters, or not. Visualize the sounds think about how the sounds tell the story without the visuals.
How sound can alter your animation? Consider your time line and how to add sound effectively to your motion.
Listen to this video. Notice how the sounds relate to the characters, or not. Visualize the sounds think about how the sounds tell the story without the visuals.
How sound can alter your animation? Consider your time line and how to add sound effectively to your motion.
Wednesday, September 29, 2010
Animation Sharing
First part of the class, we are going to have a work block. I am going to help everyone out. After lunch, we are going to have a sharing. Please save your animation to the share file under "Animation #1".
Here are a few Flash animation to check out after our sharing...
http://www.albinoblacksheep.com/flash/pencilmation1
http://www.homestarrunner.com/
http://www.paulfrank.com/home/
http://www.youtube.com/watch?v=YwNVE37BGVE
Here are a few Flash animation to check out after our sharing...
http://www.albinoblacksheep.com/flash/pencilmation1
http://www.homestarrunner.com/
http://www.paulfrank.com/home/
http://www.youtube.com/watch?v=YwNVE37BGVE
Monday, September 27, 2010
More Animation
Today I am going to demonstrate the following:
Movie Clip
Gradient Tool
Transform
Info
Shaila is going to show how to use the Bone tool.
And a few new tools as the interest comes up.
Movie Clip
Gradient Tool
Transform
Info
Shaila is going to show how to use the Bone tool.
And a few new tools as the interest comes up.
Thursday, September 23, 2010
Flash Demo2
2nd Flash Demo-
Today we are going to explore the Drawing abilities of Flash:
Today we are going to explore the Drawing abilities of Flash:
- Using the pencil + attributes- stroke.
- The Brush tool + attributes- painting inside, fills etc...
- Fill tool- closing gaps
- Sub-Selection lool
- The eraser
- Editing your symbol
- Break Apart your symbol
- Try a shape tween
Wednesday, September 22, 2010
Flash Animation

Today we are going to learn how to draw and animate in Flash. Flash is a fun program that makes animation easy... well it takes a bit of time to learn, but there are many things it can do. It can help you create digital animations, help you design games, and help generate cool websites. I say it can help, because you are the designer and creator, you have to make the choices to create your piece.
Here's an intro to Flash
Animator vs. Animation
We are going to learn about the following:
- The stage
- Tool bar
- Document set-up
- Frame by frame animation
- Creating a symbol
- Key frames
- Motion tweening
- Scale
- Colour- Tone/alpha
Tuesday, September 21, 2010
FlipOff
We are going to look at each other's flip books! Put your name and name of book on the envelope and slip it inside of your flipbook. Then you are going to put your book into the hand-in box. Everyone will take a book- flip through a few times and write a comment about the book on a sheet of paper. Topics to consider story, imagery, motion, sequencing... Flip through 15+ Pass it on.
Reflect on your Flip Book using Word, save to your file on the network called flip book:
Reflect on your Flip Book using Word, save to your file on the network called flip book:
- Was the story clearly told/illustrated? How could it improve?
- Is the motion smoothe?
- Is there a beginning, conflict and resolution?
- How is the character established?
- Is the ending effective- why or why not?
- How would you do it differently
Tuesday, September 14, 2010
Storyboard Examples
You are going to select a short sequence from "Up" and re-storyboard it based on the events in the clip. You are to tell the story visually as if you had to pass the storyboard to another animator to render. 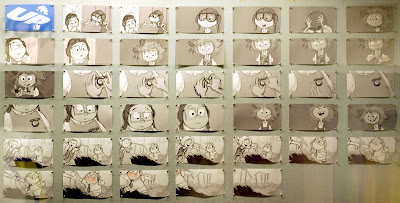 Your illustrations do not have to be accurate, can be fairly crude, but try to show development of movement and camera angles, point of view, expressions, movement and changes. We are going to storyboard a short scene together and then you are to choose your oun to try.
 Your illustrations do not have to be accurate, can be fairly crude, but try to show development of movement and camera angles, point of view, expressions, movement and changes. We are going to storyboard a short scene together and then you are to choose your oun to try.
Monday, September 13, 2010
UP: Storyboards
View the first 2 clips- Telling the story
First as a class, we are going to look behind the Disney and Pixar scenes to see some of the inspiration and planning around the storytelling in the animation.
Storyboard a clip from "UP"
Select one of the following clips and storyboard the sequence onto paper. Tell the story from sequence to sequence; when there is a change in camera direction, or point of view, start drawing a new frame on your storyboard, look carefully, notice details:
What's Up?
 We will finish watching "UP" and then reflect on the story.
Reflect on the overall story
- Who are the main characters?
- Identify the main locations?
- How is the story set up?
- Foreshadowing is used to keep the viewer in suspense, name one way it is used in "UP".
- What is the main struggle/conflict(s)?
- How is the conflict resolved?
- Comment on the overall animation- do you like the cartoon? Why or Why not?
- What was your favourite part of “UP”? Explain why.
- What was your least favourite part of “Up”? Explain why.
- Who is your favourite character? Explain why.
Subscribe to:
Posts (Atom)